 how-to
Fence Post Installation in Clay Soil: A Step-by-Step Guide
Table of Contents
- Why Clay Soil Demands a Different Approach to Fence Post Installation
- Digging Fence Post Holes in Clay Soil: Preparation and Technique
- Fence Post Depth for a 7-Foot Fence in Clay
- Concrete vs. Gravel for Fence Posts in Clay Soil
- Fence Post Drainage in Clay Soil: Managing Water and Preventing Rot
- Choosing Durable Posts for Clay Soil Conditions
- Step-by-Step Installation Process
- Common Installation Mistakes to Avoid
- Frequently Asked Questions
Last Updated: October 16, 2026
Why Clay Soil Demands a Different Approach to Fence Post Installation
Clay soil holds water and compacts hard, destabilizing posts over time. Posts lean, settle, or rot faster in clay than in other soil types.
Fence post installation in clay soil demands attention to three critical factors: drainage, depth, and backfill material.
Clay retains moisture far longer than other soils, promoting wood rot at the post base and preventing proper compaction. Frost heave also pushes harder on posts set in clay.
The fix starts before you dig the first hole.
Digging Fence Post Holes in Clay Soil: Preparation and Technique
Assessing soil moisture and digging conditions
Before you dig, grab a handful of soil and squeeze it in your fist.
A tight ball that holds its shape means heavy clay. Muddy or sticky means a high water table.
Dig after a dry spell, not during or right after rain. Wet clay sticks to tools, compacts poorly, and won't provide stable support.
Signs your soil is too wet to work:
- Mud clings to your shovel
- Water pools in the hole
- Soil feels slippery or greasy
- The hole collapses inward
If you hit these conditions, wait a week and try again.
Tools and equipment you'll need
Digging tools:
- Post hole digger (manual or power auger)
- Shovel (pointed for clay, flat for moving material)
- Mattock or pickaxe (clay breaks easier with a pickaxe than a shovel)
- Wheelbarrow (for moving excavated soil)
Installation tools:
- Level (4-foot minimum for checking plumb)
- Measuring tape (at least 25 feet)
- Tamper or compacting tool
- Work gloves and safety glasses
Materials:
- Concrete mix or gravel backfill
- Water source (for concrete or compacting)
- Posts (pressure-treated wood, composite, or metal)
A power auger makes clay work far easier than hand digging, and renting one pays for itself if you're installing more than four posts.
Fence Post Depth for a 7-Foot Fence in Clay
For a 7-foot fence, set posts 3 feet deep in clay soil to provide stability while accounting for clay's poor drainage.
The general rule is one-third of the post length underground, roughly 2.3 feet for a 7-foot fence.
Depth varies by fence type:
- Standard residential fence (4-6 feet): 2-2.5 feet deep
- Tall privacy fence (7-8 feet): 3-3.5 feet deep
- High-load fence (gates, heavy panels): 3.5-4 feet deep
- Corner or end posts: 6 inches deeper than line posts
Corner and gate posts carry more load and need deeper footings.
In clay soil, deeper is always safer. Frost heave pushes harder on shallow posts, and deep posts resist that upward force better.
Concrete vs. Gravel for Fence Posts in Clay Soil
Both concrete and gravel backfill work in clay soil, but they serve different purposes. Understanding when to use each determines whether your fence lasts 10 years or 30.
When concrete is the right choice
Concrete creates a rigid bond between post and soil, resisting wind load, frost heave, and settling. For gates, tall fences, or windy areas, it's the better choice.
Concrete also seals the post base, reducing water contact and slowing rot. The tradeoff: it traps moisture against the post if drainage isn't perfect, which can accelerate rot.
Use concrete when:
- Installing a gate post or corner post
- The fence is 7 feet or taller
- Your area experiences significant wind
- You want the longest possible post lifespan
- The fence carries lateral load (privacy panels, decorative screens)
Concrete works well in clay because clay doesn't drain water away from the post base anyway, and proper drainage lets the footing prevent pooling.
When gravel backfill works better
Gravel lets water drain away from the post base. For wood posts in poorly draining clay, it can reduce rot risk compared to moisture-trapping concrete.
Gravel requires more maintenance: posts shift slightly as soil settles, so you may need to re-compact every few years. For temporary fences or where minor movement is acceptable, it's faster and cheaper.
Use gravel when:
- The fence is under 6 feet tall
- You prioritize easy removal and replacement
- The fence doesn't include a gate
- You're willing to maintain and re-compact annually
- Drainage is a significant concern
Gravel backfill in clay works best with a drainage layer; without it, water pools around the post and negates the advantage.
Fence Post Drainage in Clay Soil: Managing Water and Preventing Rot
Water management determines whether wood posts rot in five years or survive for decades. Clay soil's poor drainage makes this critical.
Identifying drainage problems before installation
Walk your property after rain. Where does water pool, and does it drain away from where you plan to dig?
If water stands in the post hole location for more than a few hours after rain, you have a drainage problem, common in clay because water can't percolate down.
Dig a test hole 2-3 feet deep, fill it with water, and if water remains after 24 hours, drainage is poor and needs addressing before installation.
Signs of poor drainage:
- Water pools in low spots after rain
- Soil stays wet days after rain
- Plants in the area are struggling
- The ground feels spongy or soft
Installing drainage solutions around the post
Gravel drainage layer: Place 4-6 inches of crushed gravel in the bottom of the hole before setting the post.
Perforated drainage pipe: For severe problems, install a short section of perforated pipe around the post base to actively move water away.
The goal is simple: water should not sit against the post base. In clay soil, this requires intentional design.
Choosing Durable Posts for Clay Soil Conditions
Post material affects both longevity and maintenance requirements in clay soil. Clay's moisture and poor drainage make this choice important.
Pressure-treated wood is the standard choice, resisting rot through chemical treatment.
Composite posts (wood-plastic blend) resist rot naturally and need no treatment.
Metal posts (steel or aluminum) never rot and suit severe drainage problems or long-term installations.
For most residential fences in clay, pressure-treated wood offers the best balance of cost and durability.
Step-by-Step Installation Process
Step 1: Mark and prepare the post hole location
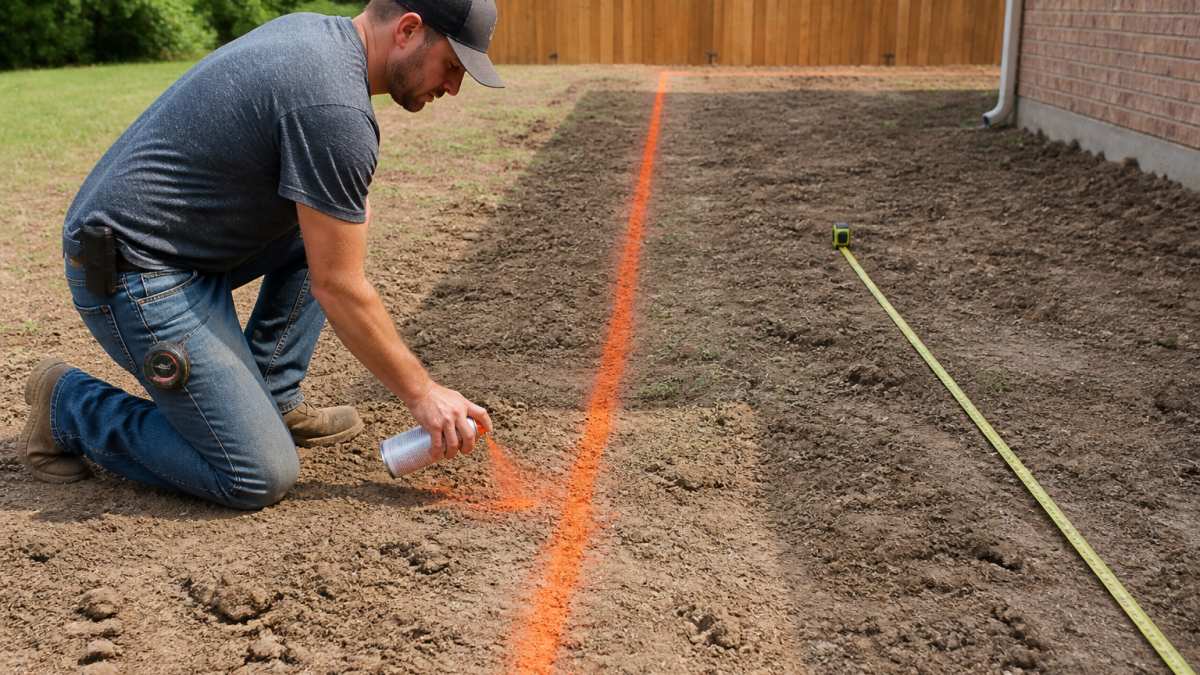
Mark every post location with spray paint or chalk, spacing posts according to panel width (typically 6 or 8 feet) and checking corners with a 3-4-5 triangle.
Verify locations before digging; a mistake wastes time and materials.
Clear rocks, roots, debris, sod, and vegetation so nothing stops your auger or digger.
Step 2: Dig to proper depth with correct hole diameter
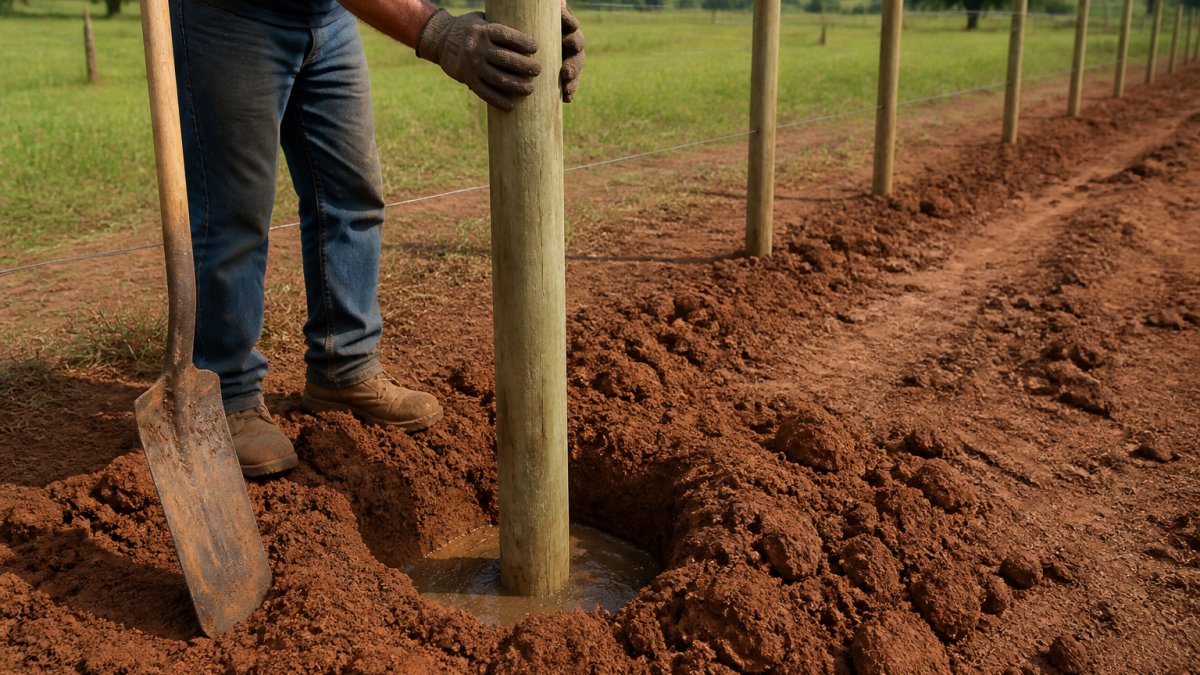
Dig 3 feet deep for a 7-foot fence. Standard posts need an 8-10 inch hole; wider holes (10-12 inches) provide more backfill and better stability.
A power auger works faster than hand digging in clay.
Remove excavated soil to the side. Clay from the hole doesn't compact well for backfill, so use gravel or concrete instead.
Check depth with a measuring tape from ground level to bottom. All holes should be the same depth.
Step 3: Prepare the post base and backfill material
Place 4-6 inches of crushed gravel in the bottom of the hole to prevent water pooling under the post.
Set the post and check it's plumb with a 4-foot level, adjusting until level in both directions.
Have backfill ready: mix concrete per package directions, or use crushed stone or pea gravel for gravel backfill, never clay from the hole.
Step 4: Set the post and compact backfill
If using gravel: add it in 6-inch layers, tamping each firmly with a hand tamper or 2x4 end. Compact hard, since loose backfill lets posts shift and is where most DIY installations fail.
If using concrete: pour around the post, keeping it plumb, and don't disturb it for at least 24 hours.
For concrete, add a subtle slope or crown at the top so water sheds away from the post base.
Step 5: Check plumb and allow proper curing
After backfill, check plumb one final time in both directions; the post should be perfectly vertical.
If using concrete, wait at least 24 hours before hanging panels; concrete cures for weeks, but 24 hours is the minimum before loading.
If using gravel, you can hang panels immediately, but avoid heavy stress for the first few days while backfill settles.
Common Installation Mistakes to Avoid
Poor backfill compaction: Loose backfill is the second leading cause of fence failure.
Using clay soil as backfill: Excavated clay compacts poorly and holds moisture.
Skipping the plumb check: Posts that aren't perfectly vertical look wrong and perform poorly.
Mixing installation methods: Don't use concrete on one post and gravel on another.
Fence post installation in clay soil succeeds when you respect the soil's unique characteristics.
Construction Services handles fence installation with soil conditions in mind. We assess drainage, dig to proper depth, use appropriate backfill, and compact thoroughly. Get a quote from Construction Services and let us handle the clay soil challenges so your fence stands straight and strong.
Frequently Asked Questions
What is the best way to dig post holes in clay soil?
Start digging when the clay is slightly moist but not waterlogged, this makes the soil workable without becoming sticky. Use a post-hole digger or auger to break through compacted clay, working in short strokes and removing soil frequently. For deeper holes, a power auger saves time and effort. Widen the hole slightly at the bottom to create a base for better post stability and drainage. Remove all loose soil from the bottom before setting the post.
Should fence posts be set in concrete or gravel in clay soil?
Concrete provides maximum stability and is ideal for corner posts, gate posts, and high-load applications. However, concrete can trap moisture around the post base in clay, accelerating wood rot. Gravel backfill allows water to drain away and is better for standard fence sections in clay soil, especially when combined with a drainage layer. For the best of both approaches, use concrete in the upper portion of the hole and gravel or native soil lower down to manage moisture.
How deep should a 7-foot fence post be in the ground?
A 7-foot fence post should be set 24 to 30 inches deep in clay soil. This depth provides adequate embedment for stability while accounting for clay's tendency to shift with moisture changes. Use the rule of one-third depth: roughly one-third of the total post length should be below ground. For corner posts and gate posts, consider going 30 to 36 inches deep for extra stability under higher loads.
How can you improve drainage around a fence post in clay soil?
Create a drainage layer by placing 4 to 6 inches of crushed gravel at the bottom of the post hole before setting the post. Slope the ground away from the post base to direct surface water away. If water pools around the post, dig a shallow trench or install a French drain nearby to redirect standing water. Avoid using pure clay as backfill; mix in gravel or sand to improve water movement. These steps prevent soil saturation and wood rot at ground level.