 how-to
How to Prepare Soil for Concrete: Step-by-Step
Table of Contents
- Why Soil Preparation Matters for Concrete Longevity
- Assess Your Site: Soil Testing and Ground Conditions
- How Deep to Dig for a Concrete Slab
- Clear, Excavate, and Remove Unsuitable Material
- Grade and Level the Subgrade
- How to Compact Soil for Concrete
- Install a Gravel Base for Concrete Slab Stability
- Manage Soil Moisture Before Pouring Concrete
- Frequently Asked Questions
Last Updated: October 19, 2026
Why Soil Preparation Matters for Concrete Longevity
Soil preparation is the foundation of every concrete project. Skip it or rush it, and you're setting up cracking, settling, and failure within a few years. Homeowners and contractors alike assume the soil is "good enough" and pour directly on top, then the concrete cracks, settles unevenly, and has to be torn out.
Concrete is only as strong as what's underneath it. Poor soil preparation leads to:
- Uneven settling and displacement
- Cracking from ground movement
- Water pooling and drainage problems
- Loss of load-bearing capacity over time
This guide walks you through each step of how to prepare soil for concrete.
Assess Your Site: Soil Testing and Ground Conditions
Before you dig, understand what you're working with. Clay, sandy, and silty soils each behave differently under concrete and require different approaches.
Start by examining your soil. Dig a small hole about 12 inches deep and look at the layers. Clay soil is dense and holds water. Sandy soil drains quickly but offers less stability. Silty soil is somewhere in between.
Soil type determines how deep you dig, what base you need, and how much drainage you must manage, understanding it now prevents expensive problems later.
If your site has had previous construction, fill, or significant organic material, consider a professional soil test. Many soils in areas with clay and variable drainage benefit from this extra step.
How Deep to Dig for a Concrete Slab
Excavation depth depends on soil conditions, climate, and what the concrete will support. There's no one-size-fits-all answer, but here's how to think about it.
For a typical residential concrete pad or driveway, you're generally removing the top layer of unsuitable material. This usually means:
- Removing all topsoil and organic material (typically 2-6 inches)
- Excavating to stable, undisturbed soil
- Adding a gravel base on top
For a concrete slab that will support a structure or heavy loads, you may need to dig deeper to reach stable subgrade. Soft spots, loose soil, or areas with previous fill require more aggressive excavation.
The key is reaching solid ground that won't settle or shift under the weight of concrete.
When in doubt, err on the side of going deeper and removing more unsuitable material. It's far cheaper to remove extra soil now than to deal with concrete failure later.
Clear, Excavate, and Remove Unsuitable Material
Now clear the site of everything that shouldn't be under your concrete: topsoil, vegetation, organic material, and any loose or soft soil.
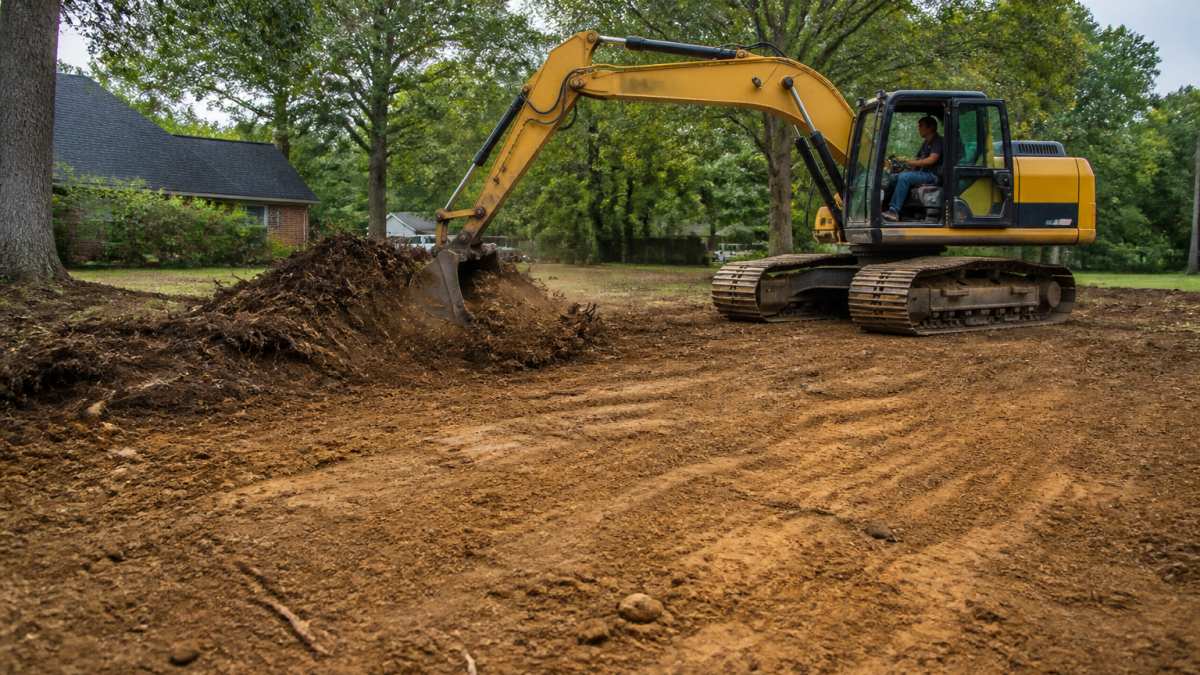
Remove all vegetation, roots, and debris from the surface, a skid steer or excavator makes this fast and thorough.
Next, excavate the topsoil layer. Topsoil is organic-rich and unstable for concrete. Remove it completely down to the mineral soil beneath.
Continue excavating until you reach stable, undisturbed soil, firm ground that doesn't shift when you walk on it.
Remove excavated material from the site or stockpile it separately. A clean, cleared site makes the next steps easier and ensures a stable base.
Grade and Level the Subgrade
Once unsuitable material is removed, grade and level the subgrade, a smooth, even surface at the correct elevation for your concrete.
Use a grader or bulldozer to cut high spots and fill low spots. The goal is a uniform surface with proper slope for drainage. For most applications, a slight slope (about 1/8 inch per foot) is ideal.
Check frequently with a level or laser level. Cut high spots and fill low spots with compacted material, no bumps, dips, or soft areas. The more uniform your subgrade, the more uniform your concrete thickness and strength.
Pay special attention to drainage: grade the subgrade so water flows away from the pad and toward drainage areas, since water pooling under concrete will eventually cause problems.
How to Compact Soil for Concrete
This is where many DIY projects fail. Compaction isn't optional, and a hand tamper won't cut it on a large area. Loose soil settles over time, and concrete on top of it cracks and settles with it.
Proper compaction removes air pockets and increases load-bearing capacity. The goal is a consistent, dense subgrade, not just "walk on it and it feels firm."
Match the compactor to the job
- Plate compactor (vibratory plate): Best for granular soils, gravel base, and small to mid-size pads. Common weights run roughly 100-300 lb.
- Jumping jack / rammer: Best for cohesive soils like clay and for trench backfill. Delivers impact rather than vibration.
- Vibratory roller (walk-behind or ride-on): Best for larger areas and deeper lifts; more efficient than a plate on big driveways and slabs.
- Hand tamper: Acceptable only for tiny patches, corners, and around penetrations, not for a full subgrade.
Layer thickness and passes
Keep lifts within what your equipment can actually densify. As a practical rule:
- Spread soil in lifts of about 4-6 inches for plate compactors and rammers; rollers can handle somewhat thicker lifts in granular material.
- Run the compactor over each lift in multiple passes, typically 3-4 passes minimum, overlapping each pass by about half the machine width.
- Add the next lift only after the previous one is firm and stable.
- Repeat until you reach final grade elevation.
- Make a final overlapping pass over the entire surface.
Moisture: the make-or-break variable
Soil compacts best near its optimum moisture content, damp enough to bind, not wet enough to pump or rut. Dry soil stays loose no matter how many passes you make; saturated soil becomes mud and won't densify. Field check: squeeze a handful. It should hold together without dripping. If it crumbles, add water lightly and mix; if it's soupy, stop and let it dry.
How to verify compaction
You don't need a lab to know whether you're close, but you do need more than a visual check.
- Proof-rolling: Run a loaded truck or the compactor slowly over the finished subgrade. Soft spots show up as deflection, rutting, or a spongy feel. Mark and re-excavate/re-compact those areas.
- Penetrometer or dynamic cone test: A hand penetrometer gives a quick relative reading; a dynamic cone penetrometer (DCP) gives a more useful profile of strength with depth. Both are field tools, not substitutes for lab testing.
- Plate load or nuclear density gauge: These are the standard verification methods when a specified density is required. A nuclear gauge measures in-place density and moisture; a plate load test measures bearing response directly.
If your project has an engineered design, a permit condition, or a structural slab, the plans may specify a relative compaction (often expressed as a percentage of maximum dry density from a standard Proctor test). In that case, compaction should be verified by a qualified testing firm, not eyeballed. For a residential patio or walkway, proof-rolling plus a firm, uniform surface is usually the practical standard.
What "done" looks like
A well-compacted subgrade feels solid and uniform underfoot, shows no rutting under a loaded wheel, and produces a consistent, dull sound from the compactor rather than a hollow bounce. If any area still deflects, keep working it, or dig it out and rebuild the lift.
Don't compact frozen, saturated, or organic-rich soil and expect it to hold. Frozen ground compacts falsely and then loosens on thaw; saturated soil pumps; organic material continues to decompose and will leave voids under the slab.
Install a Gravel Base for Concrete Slab Stability
After compacting the subgrade, install a gravel base. It adds stability, improves drainage, buffers soil from concrete, gives a level surface for forms, and distributes loads so the slab doesn't point-load the soil beneath.
Choose the right aggregate
Use crushed stone or gravel with angular, interlocking particles, not round river rock, which rolls and shifts under load. Common choices are crushed stone graded from fines up to about 3/4 inch (dense-graded base or "crusher run"). The fines help it bind and compact; open-graded stone drains faster but locks together less. For most residential slabs, dense-graded crushed base is the practical default.
Base depth is a decision, not a constant
There's no single correct base depth. The right number depends on soil type, drainage, climate, and what the slab will carry. Use this as guidance, not a specification:
- Walkways and small patios: A thinner base is often adequate where soil is stable and well-drained. The base mainly provides a level, uniform bed and a capillary break.
- Driveways and parking pads: Vehicle loads demand a thicker, well-compacted base and more attention to subgrade strength. Soft or clay-heavy subsoil usually calls for a deeper base and possibly a geotextile separator.
- Structural slabs and slabs supporting buildings: Base depth and slab design should follow an engineered plan. Don't guess, the design should account for soil bearing capacity and expected loads.
- Expansive clay or poorly drained sites: A thicker granular base plus drainage improvements (and sometimes a geotextile) helps isolate the slab from soil movement.
Treat any single "standard" base depth with suspicion. The right depth is the one that matches your soil, your drainage, and your loads, and that gets compacted properly.
Install it correctly
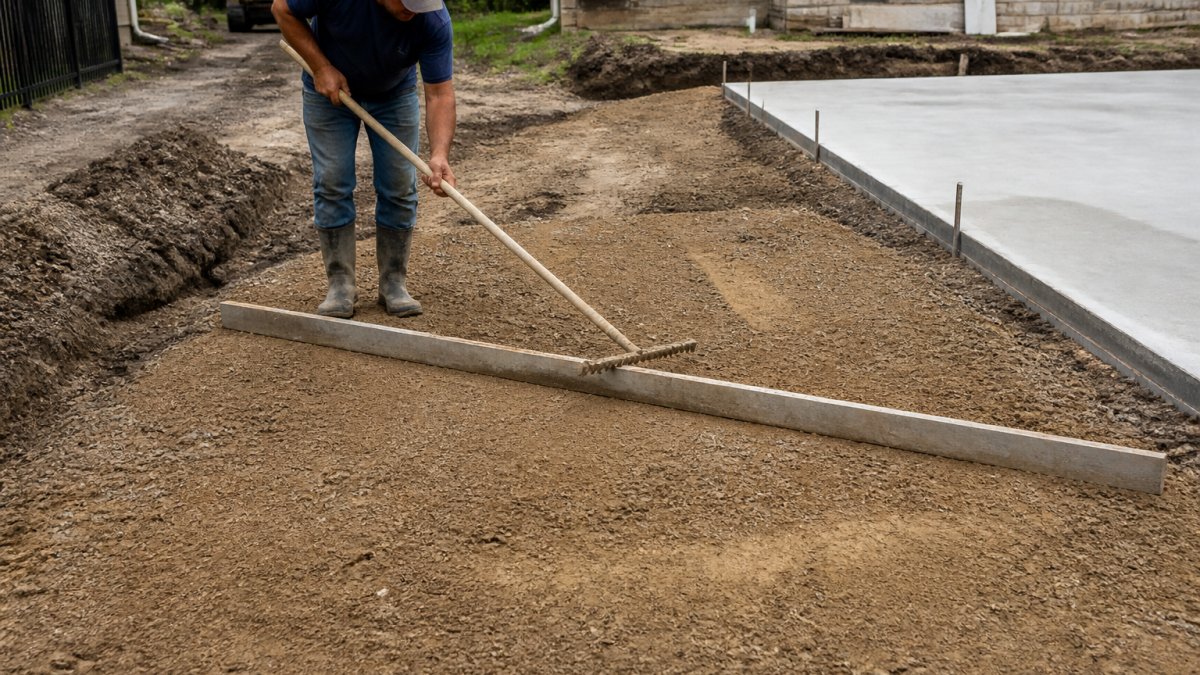
- Spread the crushed base evenly over the compacted subgrade.
- Rake it to a uniform depth, avoid thick spots and thin spots.
- Compact in lifts with a vibratory plate or roller, multiple overlapping passes per lift, just as you did the soil.
- Check grade and slope as you go; correct high and low spots before the final pass.
- Consider a geotextile separator between subgrade and base on soft, fine-grained, or wet soils to prevent fines from pumping up into the base.
Slope and drainage
Grade the finished base so water sheds away from the slab, a slight slope (on the order of 1/8 inch per foot) is typical for surface drainage. Water that ponds against or under a slab is a leading cause of heaving, settlement, and surface deterioration. Make sure the base ties into the site's overall drainage rather than trapping water at the slab edge.
Check before you pour
After compacting, the base should be firm, uniform, and level (with the intended slope). Walk it, proof-roll it, and look for soft spots or loose material. Fix them now. This is also the point to set and brace formwork, install a vapor barrier where appropriate, and place rebar or wire mesh before the pour.
If you're planning a concrete project and want guidance matched to your site's soil and drainage, Construction Services can help. We handle residential and commercial concrete work within 50 miles of our Gun Barrel City office, and we know how to prepare soil for concrete in local conditions. We Do That, get in touch for a consultation and estimate.
Manage Soil Moisture Before Pouring Concrete
Soil moisture is often overlooked but critical. Too much water under concrete causes problems; too little affects compaction and curing.
Before pouring, check soil moisture. The subgrade and base should be slightly damp but not wet.
On the flip side, if conditions are very dry, lightly water the subgrade and base a day or two before pouring.
The ideal scenario is a slightly moist, well-drained subgrade with stable soil conditions. This gives concrete the best foundation for long-term durability.
Proper soil preparation is the foundation of any concrete project that lasts.
If you're planning a concrete project and want expert guidance specific to your site conditions, Construction Services can help.
Frequently Asked Questions
Can I just pour concrete over dirt?
No. Pouring concrete directly over loose soil or organic material leads to settlement, cracking, and uneven surfaces. You must remove topsoil and vegetation, compact the subgrade, and install a gravel base to distribute the load and prevent ground flexing. Skipping these steps typically results in costly repairs within a few years.
How long should dirt settle before pouring concrete?
There's no magic waiting period. The key is proper compaction and verification. After grading and installing your base layer, compact the soil in 4-6 inch lifts using a plate compactor or tamper. Once each lift reaches the target compaction density (typically 95% of maximum), you can proceed to the next step. Proper compaction prevents settlement; time alone does not.
Should you wet the soil before pouring concrete?
Soil moisture affects compaction. Soil that is too dry or too wet compacts poorly. The optimal moisture level is when soil clumps slightly when squeezed but crumbles apart easily. Before compacting, lightly mist dry soil or allow wet soil to dry slightly. Do not saturate the subgrade immediately before pouring; excess moisture can trap water beneath the slab and cause durability issues.
What do you put down before pouring concrete?
After compacting the subgrade, install a gravel or crushed-stone base layer, typically 4-6 inches thick. This base improves drainage, provides a level working surface, and distributes the load. For slabs on grade, add a vapor barrier (polyethylene sheeting) over the gravel to reduce moisture migration into the concrete. For reinforced slabs, place rebar or wire mesh before pouring.